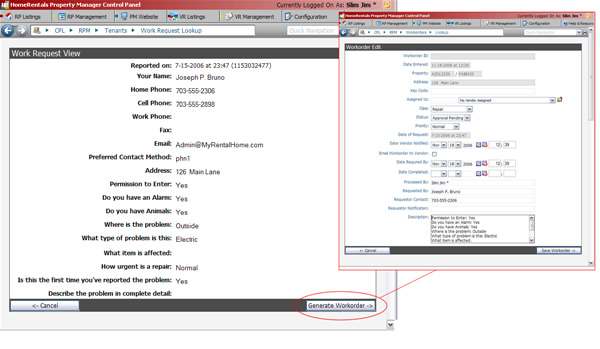
Figure 44 |
| 1. | Click “Generate Workorder” to open the workorder screen. (Figure 44) |
| 2. | Many of the fields on the workorder screen will be populated with the information from the original work request. You should fill in the remaining fields; and it is critical that you specifically assign a vendor and enter a “Date Required by.” |
| 3. | If you want to email the workorder directly to a vendor, mark the “Email Workorder to Vendor” checkbox. |
| 4. | Click “Save Workorder.” A confirmation message will be displayed to let you know that the workorder has been saved and sent successfully, and the “Workorder Lookup” screen will appear. |
The “Workorder Lookup" screen presents you with the following management options: Delete, Edit, Notes, Docs, and View. These options are described in greater detail in the following “Managing Workorders—Vendors” section.
|
